How do I upload Evidence?
You will need to include supportive evidence to validate the information provided in the School Profile. The following steps outline how to add evidence to your Self Study report:
- You can upload or enter evidence directly while completing the Self Study standard indicators
- Click the Upload Now button to upload new evidence, or click the Attach Existing button to attach evidence that you have already added to the Evidence Manager

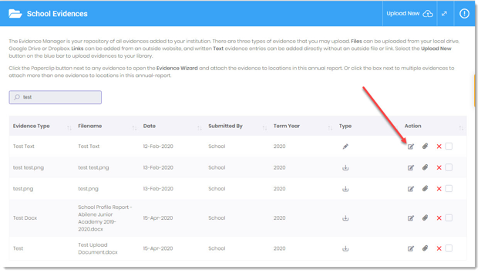
- The Evidence Manager is a central repository for storing all of your School Evidences. The Evidence Manager lets you add your evidences and then attach them to any appropriate location without needing to upload multiple times
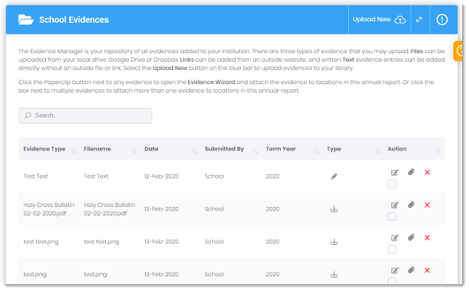
- You can upload multiple evidences, or even all of your evidence at one time and then attach them to the appropriate standards
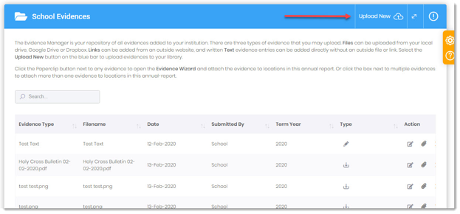
- To upload evidence directly in the Evidence Manager, click on the Upload New button
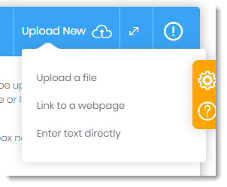
- Choose to upload a file, or enter text directly
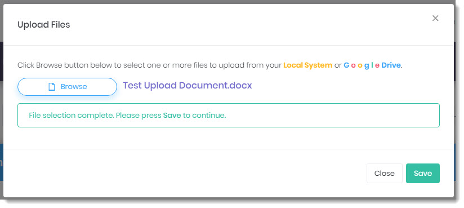
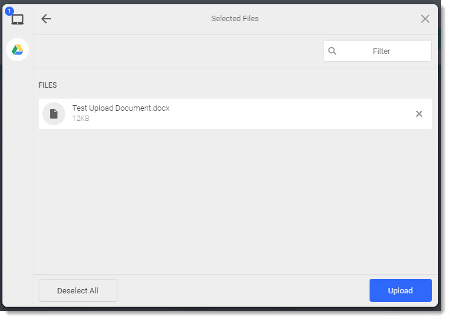
- If uploading a file, click the Browse button and select or drag and drop your files, click the Upload button, and then click the Save button
- Enter the evidence Type. This should be the name of your evidence and will default to the file name if you do not enter a type
- Add a Description that will be helpful and informative for the reviewers

- Click the Save button
- To attach one evidence to a standard, click on the paperclip icon
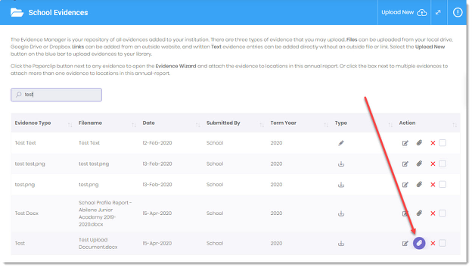
- To attach multiple evidences at one time, click the checkbox next to each and then click the Add Multiple Evidences button

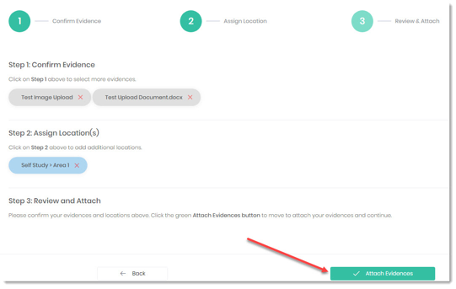
- First, Confirm the evidence by making sure you selected the correct evidences
- Click the red X to remove an evidence
- Click the View More Evidences button to add additional evidences
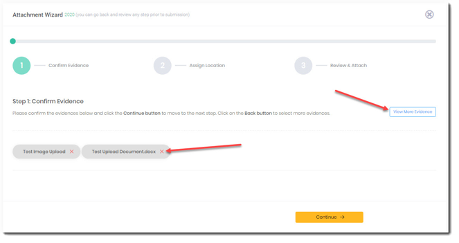
- Once your evidence(s) is/are confirmed, click Continue
- Next, Assign the evidence(s) to a location by clicking in the drop down box and selecting the appropriate standard or area
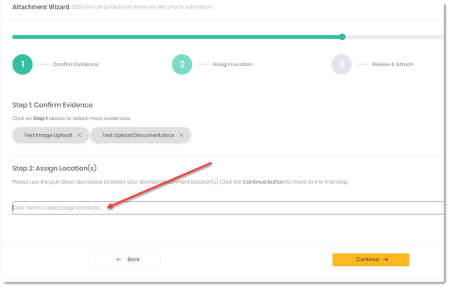
- You can select multiple locations and remove locations by clicking the x next to the location title
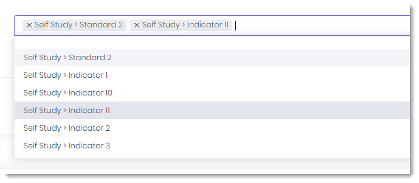
- Once you have selected all locations, click Continue
- Finally, review the evidence(s) and the location(s) you chose and click the Attach Evidences button
- To edit evidence, click on the Edit Evidence icon
- You can change the type, download the file, change the upload date, edit or add a description, and remove attachment locations
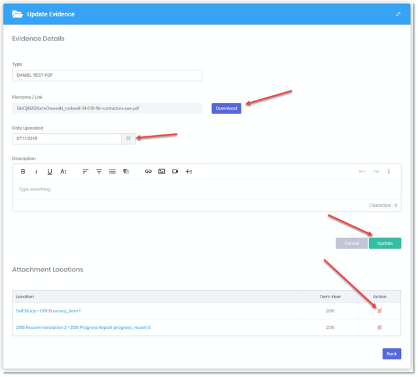
- Click the Update button to save your changes